In this blog we will discuss:
- What is debouncing ?
- Debouncing in Vanilla JS
- Debouncing in React.js
- What is Throttling ?
- Throttling in Vanilla JS
- Throttling in React.js
- Difference between Debouncing & Throttling
Introduction
Debouncing and Throttling are two patterns/techniques that are used to improve the performance of applications by limiting the rate of duplicate or unnecessary calls to functions / APIs / actions.
Functions like action handlers, API calls like autocomplete suggestions and actions like confirming a payment. These types of tasks can be rate limited to improve the performance of applications.
Rate limiting simply means restricting the number of times these actions/tasks are performed within a given period of time.
1. Debouncing
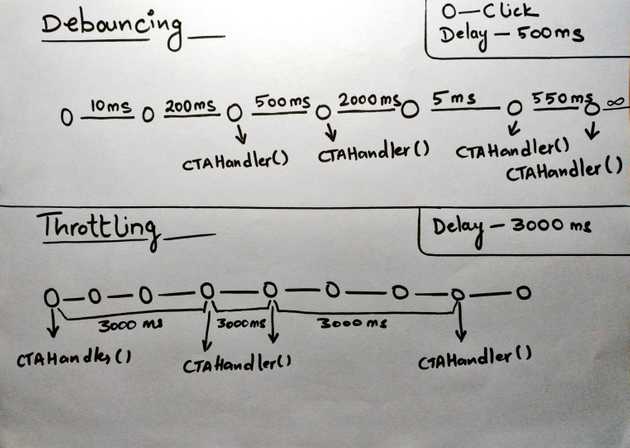
Debouncing is a technique in which we allow a task / function to be executed only if there is atleast a minimum time delay after its call to execution.
For example: If the user, for some reason, is clicking on a CTA again and again then the CTA handler will be executed only when there is a defined time delay between two clicks.
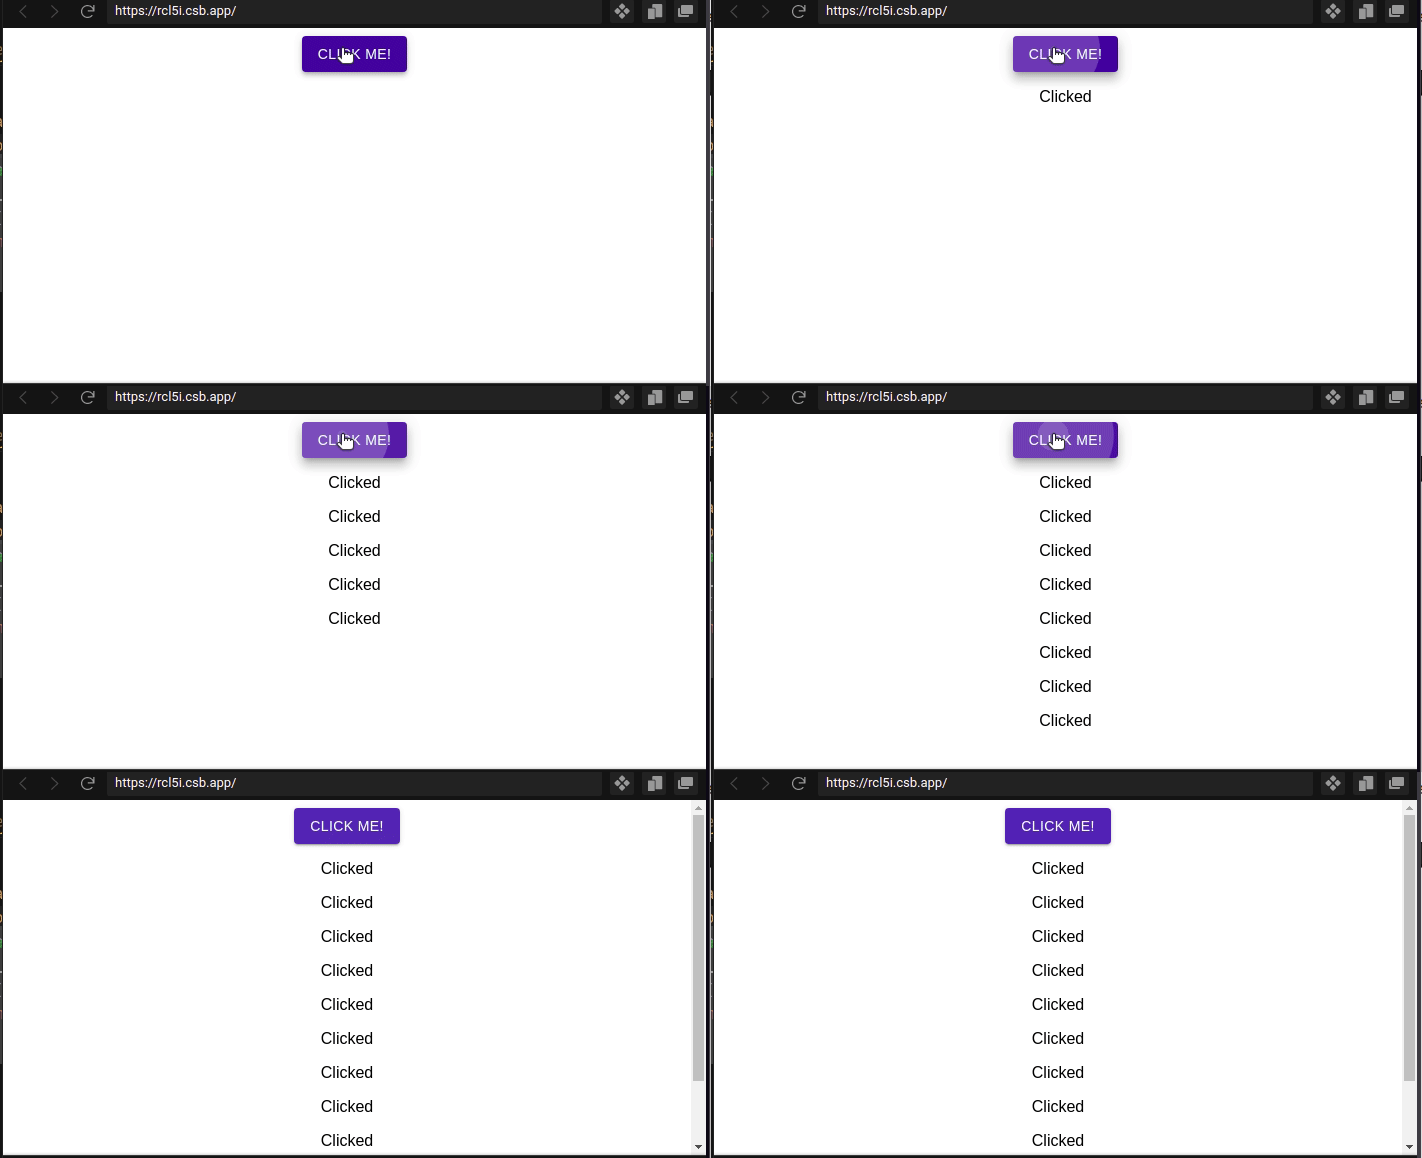
Without Debouncing
If we observe the below example, here the user is clicking the button repeatedly and the click handler is executed after every click.

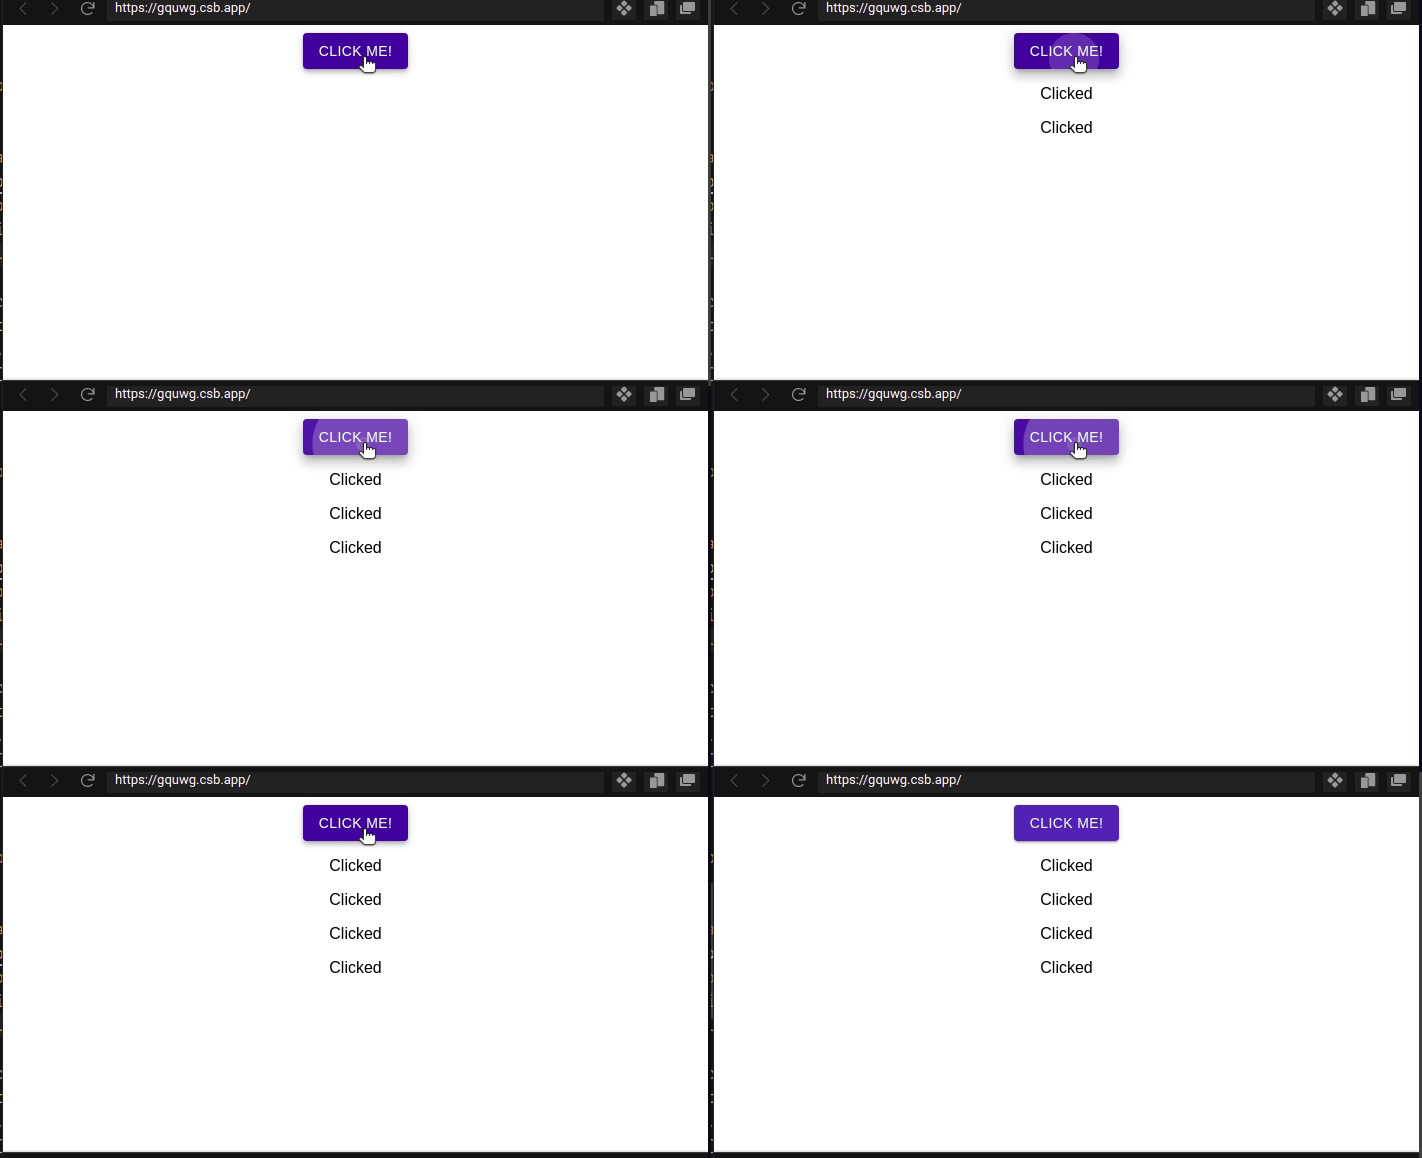
With Debouncing
But if we observe the following example, here the click handler is being executed only when the user stops for at least 500ms after clicking the button.

Debouncing in Vanilla JS
Example:
const CTAHandler = ()=>{
    console.log('Clicked');
}

function debounce(func, delay){
  let timer;
  return funtion(){
    let context = this;
    clearTimeout(timer);
    timer = setTimeout(()=>{
    func.apply(context, args)
    }, delay);
  }
}

const debouncedHandler = debounce(CTAHandler, 500);
Explanation
Consider the code example above, to debounce CTAHandler() we write a debounce() function which takes 2 arguments. The first argument is the function to be debounced (i.e. CTAHandler) and the second argument is the time delay in milliseconds.
setTimeout is used to fire the CTAHandler() after a minimum delay of specified time period.
At this point there are two possibilities:
- The user does not click the CTA again within the required time delay: in this case the CTAHandler() will be called and the debounce function will resolve.
- The user clicks the CTA again within the required time delay: in this case the debounce function will be called again and the previous setTimeout will be discarded by clearTimeout, and a new setTimeout is called, this resets our timer every time the CTA is clicked within time period.
Debouncing in React.js
Implementing debouncing in React is a little different from implementing debouncing in Vanilla JS because we need to call the same instance of debounce() and the mounting and unmounting of components in React makes it a little tricky to do so because it cannot be accomplished by just storing the reference to ‘this’ as we did in the example above by using let context = this;.
But thanks to React Hooks this is fairly easy now.
Example: App.js
import { useState, useMemo } from "react"
import "./styles.css"

export default function App() {
  const [msg, setMsg] = useState([])

  const handleClick = () => {
    setMsg(prev => [...prev, "Clicked"])
  }

  const debounce = (func, delay) => {
    let timerId
    return () => {
      if (timerId) clearTimeout(timerId)
      timerId = setTimeout(func, delay)
    }
  }

  const debouncedClickHandler = useMemo(() => {
    debounce(handleClick, 500)
  }, [])

  return (
    <div className="App">
      <button onClick={debouncedClickHandler}>Click me!</button>
      {msg?.map(item => (
        <p>{item}</p>
      ))}
    </div>
  )
}
Explanation
In the code above we have a button element to which we have attached a click handler called debounceClickHandler. To solve the problem of calling the same instance of debounce() we have used a React Hook called useMemo().
useMemo(debounce, []); will only create a new instance of the debounce function when the dependencies change and since we passed an empty array as the dependency it will never create a new instance and thus we can call the same instance even after multiple rerenders of the component.
2. Throttling
Throttling is a technique in which we allow a task / function to be executed only if there is atleast a minimum time delay after its previous call to execution.
For example: If the user, for some reason, is clicking on a CTA again and again then the CTA handler will be executed on the first click and again only after the specified minimum time period after the previous click for which the CTA handler was executed.
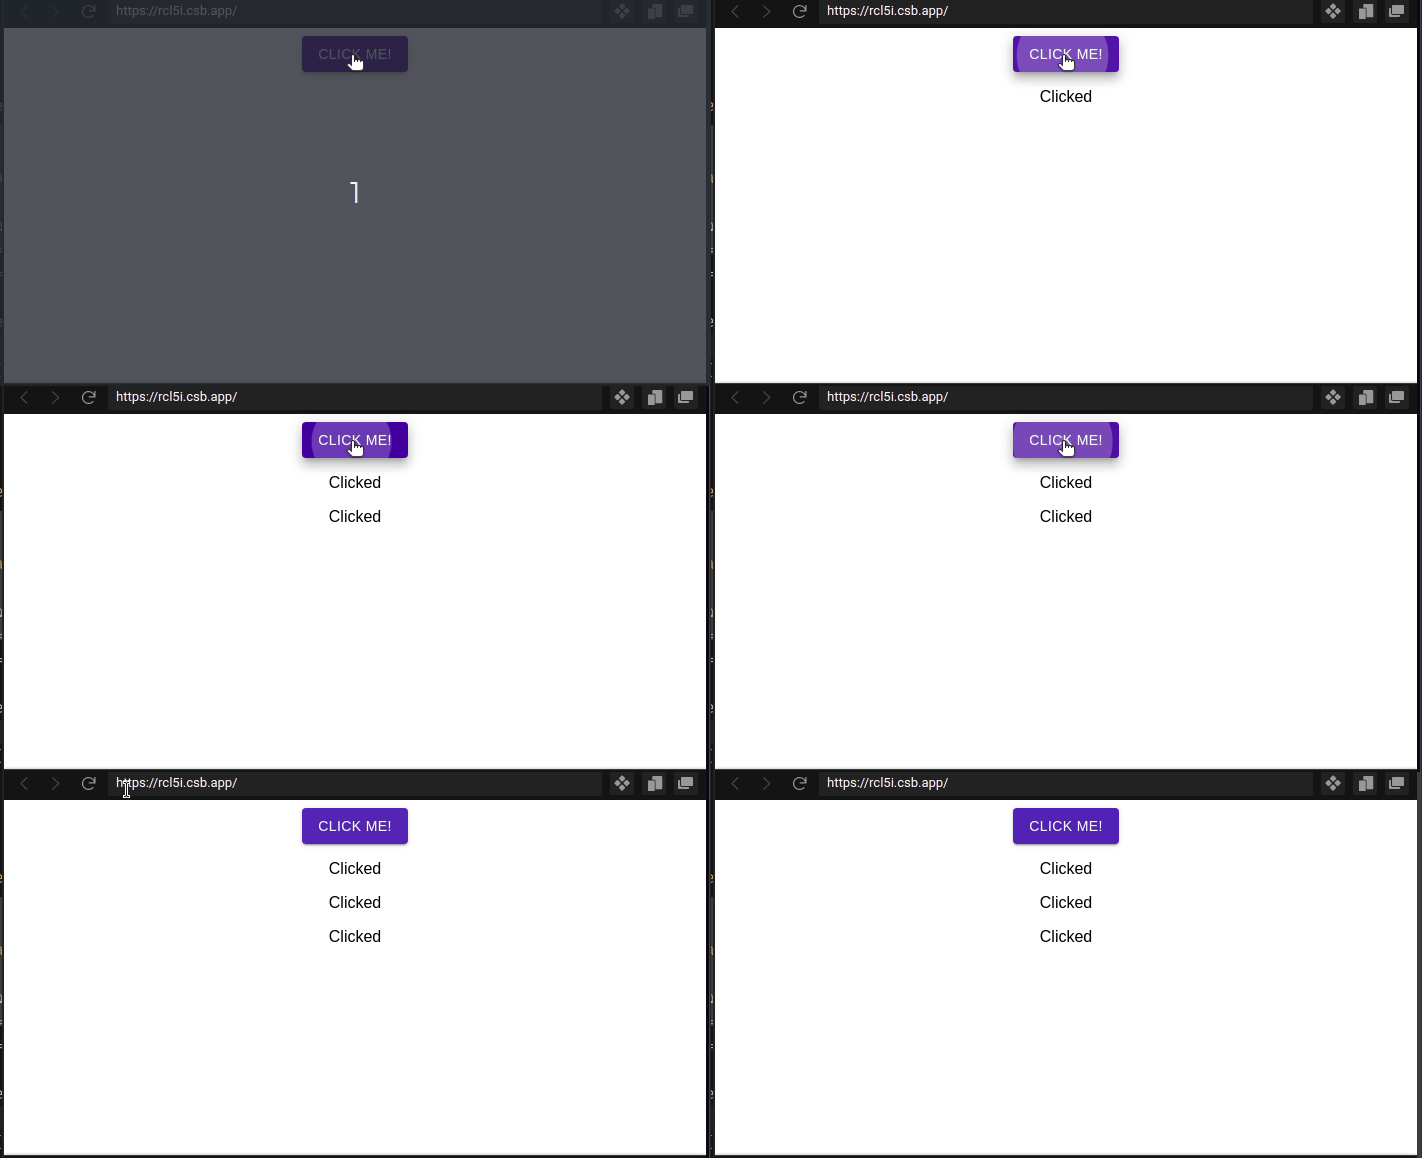
Without Throttling
If we observe the below example, here the user is clicking the button repeatedly and the click handler is executed after every click.

With Throttling
But if we observe the following example, here the click handler is being executed on the first click and then only after at least 3000ms after the previous execution of the click handler.

Throttling in Vanilla JS
Example:
const CTAHandler = ()=>{
    console.log('Clicked');
}

function throttle(func, delay){
  let timer = 0;
  return funtion(){
    let context = this;
    if(timer === 0){
    func.apply(context, args)
    timer = setTimeout(()=>{ timer = 0;}, 3000);
    }
  }
}

const throttledHandler = debounce(CTAHandler, 500);
Explanation
Consider the code example above, to throttle CTAHandler() we write a throttle() function which takes 2 arguments. The first argument is the function to be throttled (i.e. CTAHandler) and the second argument is the time delay in milliseconds.
At this point there are two possibilities:
- The user clicks the CTA once: in this case the CTAHandler() will be called, then setTimeout will be called to keep a track of the time after the CTAHandler() was called and after the specified time delay throttle function will resolve.
- The user clicks the CTA repeatedly: in this case the CTAHandler() will be called on the first CTA click then setTimeout will be called to keep a track of the time after the CTAHandler() was called and only after the specified time delay the CTAHandler() will be called again.
Throttling in React.js
We face the same issue as we faced with debouncing in React.js and the same solution can be used to solve it.
Example: App.js
import { useState, useMemo } from "react"
import "./styles.css"

export default function App() {
  const [msg, setMsg] = useState([])

  const handleClick = () => {
    setMsg(prev => [...prev, "Clicked"])
  }

  const throttle = (func, delay) => {
    let timerId = 0
    return () => {
      if (timerId === 0) {
        func()
        timerId = setTimeout(() => {
          timerId = 0
        }, delay)
      }
    }
  }

  const throttledClickHandler = useMemo(() => {
    throttle(handleClick, 3000)
  }, [])

  return (
    <div className="App">
      <button onClick={throttledClickHandler}>Click me!</button>
      {msg?.map(item => (
        <p>{item}</p>
      ))}
    </div>
  )
}
Explanation
The solution is the same as debouncing in React.js.
3. Difference between Debouncing and Throttling
To understand and remember the difference, we can think of it as:
Debouncing: executes the function on the last click.
Throttling: executes the function on the first click and then disables the button for some time.
This is not the exact definition but just a way to remember the difference
I hope this helped you in understanding the concept of Debouncing and Throttling.

